How to configure your new FibreNest Node
IMPORTANT
If your property has previously been occupied by another homeowner or tenant, you must first perform a factory reset of your Parent Node before starting these instructions.
See the 'Having Problems' section at the bottom of this page.
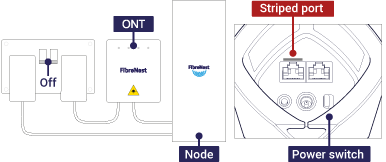
Step 1.
Connect up and power off
Make sure your FibreNest ONT and Node are connected as shown and are both powered off. Important: Connect the devices using the port under your Node which is marked with a stripe.
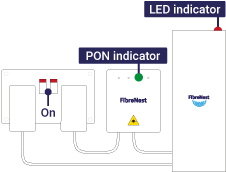
Step 2.
Power back on and check the status of your LED indicators
Turn the power to your FibreNest ONT and Node on and wait for approximately ten minutes (this is important) whilst they fully power up. Then, check the LED indicators are illuminated as follows:
ONT – The PON indicator should be solid green. If it is flashing green, wait for it to turn solid before continuing. If it is illuminated red, this means that there is a fault with your connection and you should contact our Customer Support team on 0333 234 2220.
Parent Node – The LED indicator will either be solid red or purple at this stage depending on the exact model you have received. This is normal and it will remain one of these colours until you have completed the activation process, after which it should turn solid blue.
Step 3.
Connect to your WiFi network
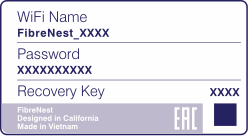
Connect your smart device to the WiFi network using the details found on the sticker underneath your FibreNest Node (you will need to remove your Node from the wall to do this).
Step 4.
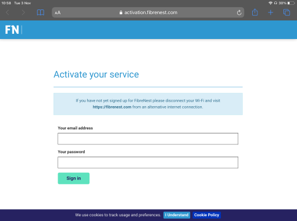
Activate your broadband service
Once your smart device is connected to your WiFi network, you should be automatically directed to our Service Activation page.
Activation page not loading, or just getting a blank screen? Try this process again on a different type of device if possible. For example, try using an iPhone or a laptop if you are having problems setting up your node using an Android device (or vice-versa).
If you have tried this and are still having problems, try typing http://servicecheck.fibrenest.com into your web browser once you have connected to your WiFi.
Login using the email address and password you used to register for FibreNest and follow the on-screen prompts to get online.
That's it!
You should be online
Step 5. (this is optional)
Download the Linksys app to your smart device
Click one of the buttons below to download the app which can be used to take advantage of your Node's advanced features.


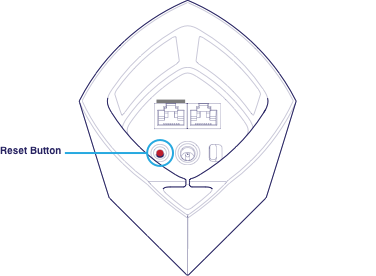
Having problems?
If you experience any issues, such as having previously tried to configure your FibreNest Node and failed, you should perform a factory reset and attempt the above instructions again. To do this, with the Node turned on, simply press and hold the 'Reset' button underneath the Node for at least 12 seconds. The Node's LED indicator will turn red and fade in three pulses. Do not release the Reset button until the light goes out and turns bright red.